
Every party needs a special dessert that makes guests’ eyes light up. Cake truffles are my secret for unforgettable sweet moments. They turn ordinary cake into magical, portable treats that everyone loves.
Imagine a celebration where guests can grab a cake ball easily, without the mess of traditional cake. That’s the magic of this versatile recipe. Whether it’s a birthday, wedding shower, or casual get-together, these treats will be the highlight.
The beauty of cake balls is their flexibility. You can change them up with different cakes, coatings, and decorations. From classic chocolate to unique flavors, there’s something for everyone.
Table of Contents

Key Takeaways
- Cake balls are perfect for multiple occasions
- Easy to customize and create unique flavor combinations
- Portable and mess-free dessert option
- Appeals to both kids and adults
- Requires minimal baking skills
Why Cake Balls Are the Ultimate Party Treat

Cake balls have changed the dessert world, becoming a key treat for any party. These small treats are a no-bake wonder that can make your party menu stand out. They’re fun to make, whether you’re new to baking or have lots of experience.
So, why do people love cake balls so much? Let’s look at why they’re perfect for parties:
- Portability: Easy to carry and serve at any event
- Versatility: You can change flavors and decorations for any theme
- Crowd-pleasing: They’re loved by people of all ages
- Simple preparation: You don’t need much kitchen skill
The charm of cake balls is in their ease and creativity. You can make a fancy dessert from leftover cake that looks like it was made by a pro but is easy to make at home. Their small size is great for parties, letting guests try different flavors without feeling stuck.
“Cake balls are like edible works of art that everyone can enjoy!” – Pastry Chef Emily Roberts
Whether it’s a birthday, wedding, or just a hangout, cake balls add fun and taste to any event. They’re more than just a sweet treat—they spark conversations and make people want your recipe.
Essential Ingredients for Perfect Cake Balls
Making tasty cake balls starts with picking the right ingredients. Success comes from using quality parts that mix well. Knowing the key ingredients helps you make cake balls that wow everyone.
Types of Cake Bases
The base of your cake balls is crucial. You can choose from:
- Vanilla sponge cake
- Chocolate layer cake
- Red velvet cake
- Carrot cake
- Lemon pound cake
Frosting Combinations
Choosing the right frosting can make your cake balls amazing. Here are some great pairings:
| Cake Base | Recommended Frosting |
|---|---|
| Chocolate Cake | Chocolate Ganache |
| Vanilla Cake | Cream Cheese Frosting |
| Red Velvet | Classic Cream Cheese |
| Lemon Cake | Vanilla Buttercream |
Selecting Coating Chocolates
The chocolate coating is the final step. Choose high-quality chocolates for a smooth melt and a great look. Professional bakers suggest:
- Belgian dark chocolate
- White chocolate melts
- Milk chocolate coating
- Colored candy melts
“The secret to amazing cake balls is in the quality of your ingredients” – Professional Pastry Chef

By picking the right cake base, frosting, and chocolate, you’ll make cake balls that look and taste great.
Kitchen Tools and Equipment Needed
To make delicious easy cake pops, you need some key kitchen tools. These tools will make baking fun and easy. Having the right equipment ready can make making cake balls a breeze.
- Large mixing bowls for combining ingredients
- Electric mixer or stand mixer
- Baking sheet with parchment paper
- Food processor for crumbling cake
- Measuring cups and spoons
- Rubber spatula
Professional bakers suggest some extra tools to make your easy cake pops even better:
| Optional Tool | Purpose | Benefit |
|---|---|---|
| Candy melting pot | Melt coating chocolate | Even temperature control |
| Dipping tools | Coat cake balls | Professional finish |
| Cake pop sticks | Create cake pop presentation | Elegant serving style |
“The right tools can turn simple cake balls into stunning dessert masterpieces!” – Professional Baker
Investing in quality kitchen equipment ensures your easy cake pops will look and taste professional every single time.
Basic Cake Balls Recipe
Making tasty cake balls starts with the right cake crumbs and mixing. This guide will show you how to make cake balls that everyone will love.
Essential Mixing Techniques
Your cake balls recipe starts with the right cake crumbs. Bake a cake and let it cool down completely. Then, crumble it into small pieces by hand or with a food processor.
- Choose a moist cake base
- Crumble cake into fine, even pieces
- Ensure no large cake chunks remain
Perfect Rolling and Shaping
For cake balls that look like they came from a bakery, size and smoothness matter. Use a small cookie scoop or tablespoon to portion out cake crumbs mixed with frosting.
- Mix cake crumbs with just enough frosting to bind
- Roll mixture into uniform 1-inch balls
- Place balls on a parchment-lined baking sheet
Chilling for Success
Chilling is key to keeping your cake balls in shape. Refrigerate them for at least 1 hour before dipping in chocolate. This helps them hold their shape.
“Patience is the secret ingredient in creating perfect cake balls” – Baking Professionals
| Step | Time | Temperature |
|---|---|---|
| Initial Chilling | 1-2 hours | 40°F |
| Final Setting | 15-30 minutes | 35°F |
Pro tip: Use cold hands or wear food-safe gloves when rolling to prevent the mixture from becoming too warm and losing its shape.
Coating and Decorating Tips
Making stunning coated cake balls is like an art. It can turn a simple dessert into a masterpiece. The right decorating techniques can make your treats stand out, perfect for parties or gifts.
- Chocolate Coating: Use high-quality melting chocolates in various colors
- Sprinkle Decorations: Add color and texture with themed or classic sprinkles
- Drizzle Techniques: Create elegant patterns with contrasting chocolate drizzles
- Edible Glitter: Introduce a touch of sparkle for festive presentations
Getting good at coating takes practice. Pro tip: Keep your chocolate at the right temperature for a smooth finish. Use a dipping fork or spoon for even coverage.
“Perfect cake balls are about precision and creativity” – Professional Baker’s Secret
For professional-looking cake balls, try these expert tips:
- Tap excess chocolate gently for a clean surface
- Work quickly to prevent chocolate from hardening
- Use parchment paper for easy cleanup and smooth removal
- Experiment with color combinations and decorative styles
The secret to great cake ball decorating is patience and creativity. Don’t be afraid to try new techniques and toppings to find your style.
Common Mistakes to Avoid When Making Cake Balls
Making perfect cake balls needs precision and practice. Even skilled bakers face challenges. Knowing these common mistakes helps you improve.
When making cake balls, several mistakes can affect the outcome. Learning how to avoid and fix these issues will boost your baking skills.
Temperature Control Challenges
Temperature is key in your cake balls recipe. Wrong temperatures can cause problems:
- Crumbly cake mixture when too cold
- Overly soft balls when too warm
- Coating that doesn’t set properly
Texture Troubleshooting
Getting the right texture is essential for tasty cake balls. Here are fixes for common texture issues:
| Texture Issue | Solution |
|---|---|
| Too Dry | Add extra frosting in small increments |
| Too Moist | Add more cake crumbs or chill longer |
| Falling Apart | Ensure proper cake-to-frosting ratio |
Coating Technique Solutions
Getting the coating right for your cake balls takes patience and skill. Cold cake balls and melted chocolate are crucial for a smooth finish.
“The secret to great coated cake balls is patience and precision.” – Professional Baker
By understanding these common challenges, you’ll be ready to make stunning cake balls. They’ll impress at any event.
Creative Flavor Combinations
Make your bite-sized treats stand out by trying new cake truffles flavors. The world of cake balls is full of possibilities for creativity.
Start your flavor adventure with these exciting combinations:
- Salted Caramel Chocolate: Chocolate cake base with caramel frosting, dipped in dark chocolate and sprinkled with sea salt
- Lemon Lavender: Lemon cake with lavender buttercream, coated in white chocolate
- Raspberry Cheesecake: Vanilla cake mixed with cream cheese frosting, rolled in white chocolate with fresh raspberry pieces
- Spiced Chai: Spice cake with chai-infused frosting, covered in milk chocolate
“Creativity is the key to transforming simple cake truffles into memorable dessert experiences.” – Pastry Chef Elena Rodriguez
When mixing flavors, balance sweet, tangy, and rich tastes. Think about tastes that work well together to add depth to your treats.
Pro tip: Always taste-test your combinations before making a big batch. Each unique blend tells a delicious story that will impress your guests and elevate your dessert game.
Storage and Make-Ahead Tips
Preparing your no-bake dessert ahead of time can save you a lot of stress. Cake balls recipe fans know that keeping them fresh is crucial. This is especially true for parties or special events.
Knowing how to store your cake balls right is key. It keeps them fresh and tasty for your guests. Let’s explore the best ways to store your homemade treats.
Freezing Your Cake Balls
Freezing is a great way to prep cake balls early. Here’s what to do:
- Freeze uncoated cake balls for up to 2 months
- Wrap each cake ball in plastic wrap
- Put them in an airtight container to avoid freezer burn
- Thaw in the fridge for the best taste
Shelf Life Guidelines
The shelf life of your cake balls depends on storage:
| Storage Location | Shelf Life |
|---|---|
| Room Temperature | 2-3 days |
| Refrigerator | 1 week |
| Freezer | 2 months |
Pro tip: Always use an airtight container to keep cake balls moist. When serving, let them sit at room temperature for 15 minutes. This brings out their full flavor.
“Preparation is the secret to stress-free entertaining!” – Baking Enthusiast
With these storage tips, you can prep your no-bake dessert cake balls recipe early. This way, you’ll always have delicious treats ready for your next event.
Party Presentation and Serving Ideas
Turn your bite-sized treats into stunning party delights. They will impress your guests and make your dessert table unforgettable. Easy cake pops are not just tasty—they’re also versatile. They can fit any event theme or celebration.
- Create a stunning dessert display using tiered cake stands
- Arrange bite-sized treats on elegant platters with decorative paper liners
- Use color-coordinated cake pops to match party themes
- Package individual cake pops as charming party favors
“The secret to a memorable party is in the details—and these easy cake pops are the perfect delightful detail!” – Party Styling Expert
For a big visual impact, try these presentation tips:
- Group cake pops by color gradient
- Alternate between different coating styles
- Use height variation to create visual interest
- Add decorative ribbons or small flags to cake pop sticks
Your guests will be amazed by the professional look of your cake pops. With a little creativity, these treats can be the highlight of any celebration.
Seasonal Variations and Special Occasions
Transforming your cake ball decorating for different seasons and celebrations makes it a memorable experience. Each holiday and special event is a chance to get creative with your dessert design.
Seasonal cake ball variations can really boost your dessert game. Here are some exciting themes to inspire your cake ball decorating:
- Winter Wonderland: White chocolate coating with silver and blue sprinkles
- Summer Tropical: Bright colored coatings with fruit-inspired decorations
- Autumn Harvest: Warm brown and orange chocolate shells with leaf-shaped sprinkles
- Spring Celebration: Pastel-colored coating with edible flower decorations
For special occasions, customize your cake balls to match the event’s theme:
| Occasion | Decoration Idea | Color Scheme |
|---|---|---|
| Wedding | Pearl-like coating with delicate piped designs | White, Ivory, Silver |
| Baby Shower | Gender-reveal themed coating | Pink, Blue, Neutral Pastels |
| Graduation | School color coating with diploma-style decorations | School Colors |
“The beauty of cake ball decorating is that your imagination is the only limit!” – Professional Baker
Your fun baking project can become a personalized masterpiece with some creativity and attention to detail. Try different techniques, colors, and themes to make your cake balls unforgettable.
Conclusion
Making the perfect cake balls recipe is more than just following steps. It’s a fun journey that turns simple ingredients into amazing treats. You’ll learn to make desserts that wow your guests and satisfy their sweet tooth easily.
Cake balls are a great baking project because they let you be creative. You can try new flavors, decorate them in unique ways, and make each batch special for any event. They’re perfect for both new and experienced bakers, offering a fun way to show off your skills.
Remember, the more you make cake balls, the better you’ll get. You’ll learn new tricks, improve your skills, and find your own style. Feel free to mix up flavors, try different coatings, and add your own special touches.
Your cake balls journey is just starting. With the tips from this guide, you’re set to make desserts that will impress everyone. Start experimenting, have fun, and enjoy the sweet rewards of your baking adventures!
FAQ
How long do cake balls typically last?
Can I make cake balls without a food processor?
What’s the best chocolate for coating cake balls?
How do I prevent cake balls from falling apart?
Can I make cake balls with gluten-free ingredients?
How do I get a smooth chocolate coating?
Can cake balls be made ahead of time?
What are some creative flavor combinations?
How do I transport cake balls to a party?
Are cake balls suitable for kids to make?

Easy Cake Balls Recipe – Perfect Party Dessert
- Total Time: 2 hours (including cooling and chilling time)
- Yield: 24–30 cake balls (depending on size) 1x
- Diet: Vegetarian
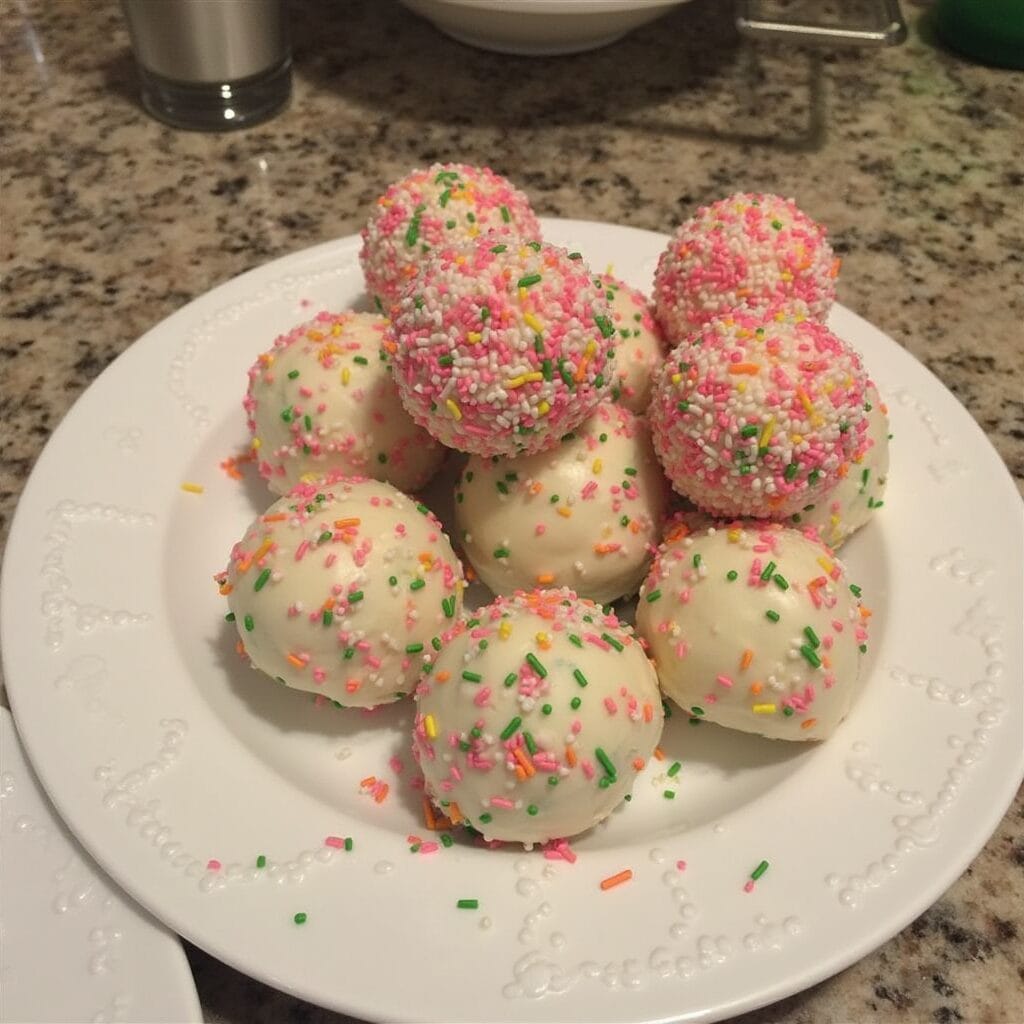
Description
Moist cake balls made with crumbled cake and frosting, dipped in chocolate. Perfect bite-sized treats for any occasion!
Ingredients
- 1 box of cake mix (any flavor)
- Ingredients needed for the cake mix (eggs, oil, water)
- 1/2 cup frosting (any flavor)
- 2 cups chocolate or candy melts (for coating)
- Sprinkles or decorations (optional)
Instructions
- Bake the Cake: Prepare and bake the cake according to the package instructions. Let it cool completely.
- Crumble the Cake: Crumble the cooled cake into fine crumbs in a large mixing bowl.
- Mix with Frosting: Add frosting gradually and mix until the cake holds together when pressed (start with 1/4 cup and add more as needed).
- Form Balls: Roll the mixture into bite-sized balls and place them on a baking sheet lined with parchment paper. Chill in the refrigerator for 1-2 hours or until firm.
- Melt Coating: Melt chocolate or candy melts in a microwave-safe bowl, stirring every 30 seconds until smooth.
- Coat the Cake Balls: Dip each ball into the melted chocolate, using a fork or skewer to coat evenly. Place back on the parchment paper.
- Decorate: Add sprinkles or decorations immediately before the coating sets.
- Set and Serve: Let the cake balls cool until the coating hardens. Store in an airtight container in the fridge. Enjoy!
Notes
- Prep Time: 20 minutes
- Cook Time: 30 minutes
- Category: Dessert
- Method: No-Bake (after initial baking)
- Cuisine: American
Nutrition
- Serving Size: 1 cake ball
- Calories: 150
- Sugar: 18g
- Sodium: 30mg
- Fat: 7g
- Saturated Fat: 4g
- Unsaturated Fat: 2g
- Trans Fat: 0g
- Carbohydrates: 21g
- Fiber: 0g
- Protein: 1g
- Cholesterol: 20mg
Keywords: cake ball recipe